Activation via Omnipeek
NOTE: Activation of LiveWire Virtual via Omnipeek is supported on Omnipeek version 13.1 or higher.
To activate LiveWire Virtual via Omnipeek:
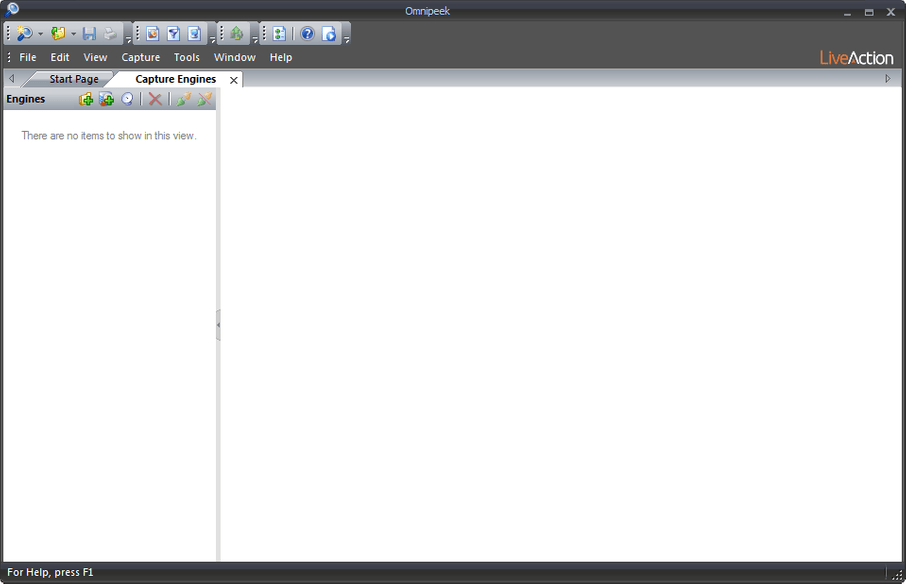
1. From the Omnipeek Start Page, click to display the Capture Engines window.
2. Click Insert Engine and complete the Insert Engine dialog.

• Host: Enter the IP address of LiveWire Virtual.
• Port: Enter the TCP/IP port used for communications. Port 6367 is the default for LiveWire Virtual.
• Domain: Type the Domain for login to LiveWire Virtual. If LiveWire Virtual is not a member of any Domain, leave this field blank.
• Username: Type the username for LiveWire Virtual. The default is admin.
• Password: Type the password for LiveWire Virtual. The default is admin.
• Save my password: Select this option to remember your password to connect to LiveWire Virtual.
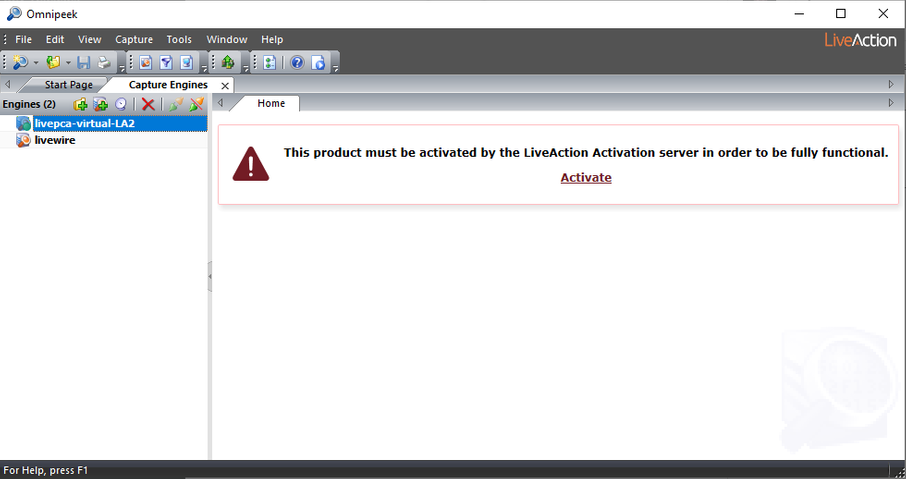
3. Click to connect to LiveWire Virtual. If LiveWire Virtual has not yet been activated, the activation message appears in the Capture Engines window.
4. Click Activate. The Activation Method dialog appears.
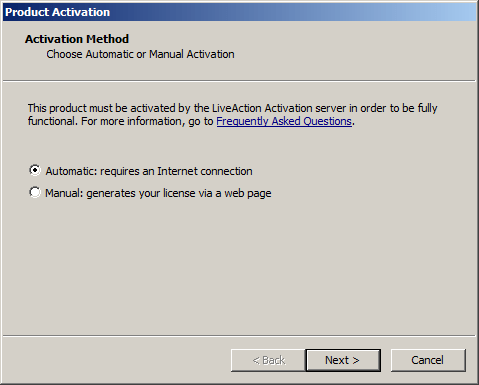
5. If your client has an active Internet connection, select Automatic and click . Otherwise, select Manual and click The Customer Information dialog appears.
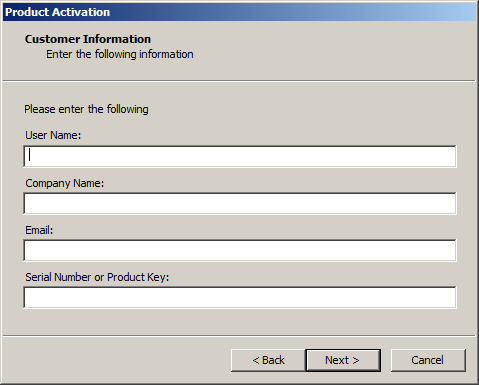
• User Name: Type the user name of the customer.
• Company Name: Type the company name.
• Email: Type the email address of the customer.
• Serial Number or Product Key: Type either the serial number or product key.
6. Complete the Customer Information dialog and click . If you selected the Automatic activation, LiveWire Virtual is now activated and you can begin using the product. The activation process is complete.
If you selected the Manual activation, the Manual Activation dialog appears. You will need to continue with the remaining steps.
NOTE: The manual activation method is available for instances when a computer does not have Internet access; however, you will need to go to a computer that does have Internet access in order to download a License file that is required to complete the manual activation.
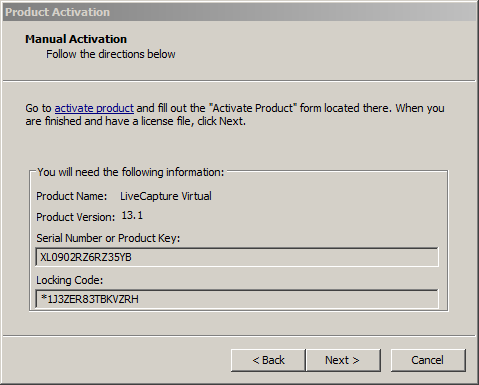
NOTE: The Product Key, and also the Locking Code displayed in the Manual Activation dialog are required in the next step. You can cut and paste this information from the Manual Activation dialog when required in the next step.
7. Click the activate product link (https://mypeek.liveaction.com/activate_product.php) in the dialog. A web browser page opens that allows you to activate your LiveAction product and to obtain and download a license file. The license file is required to complete the manual activation.
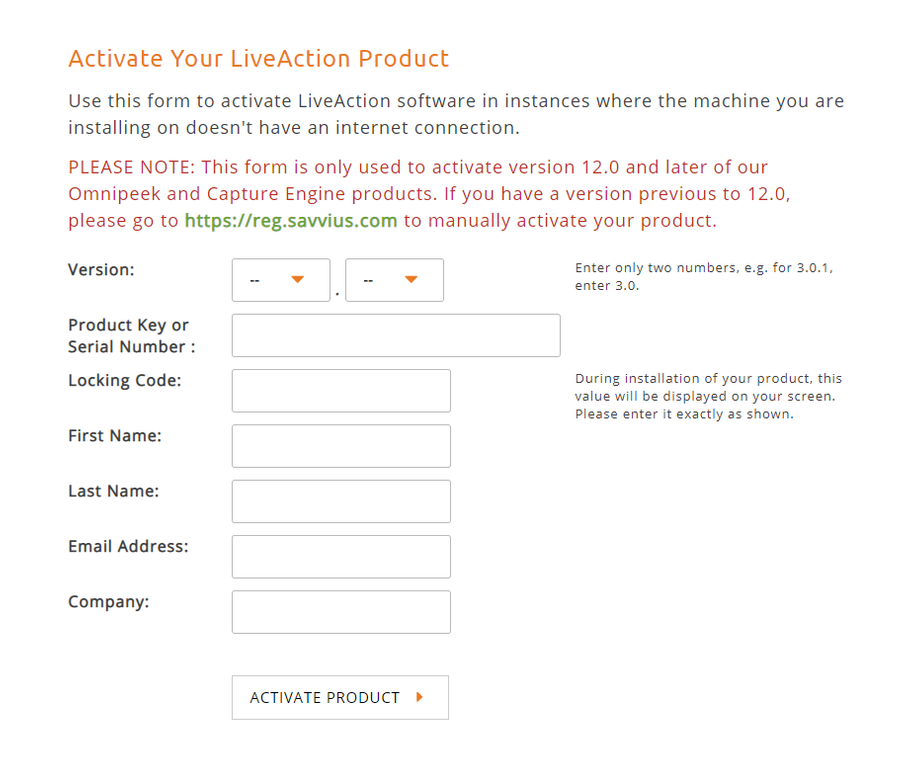
8. Complete the information on the activation page and click . The following page appears once the activation is complete.
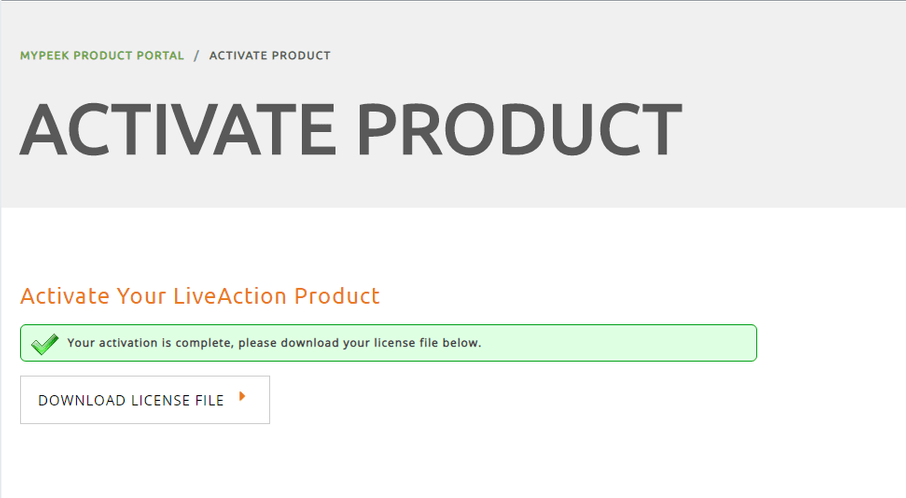
9. Click to save the license file to your computer. You will need the license file in Step 11 below.
10. Return to the Omnipeek Product Activation dialog, and click . The Manual Activation/Choose the license file dialog appears.
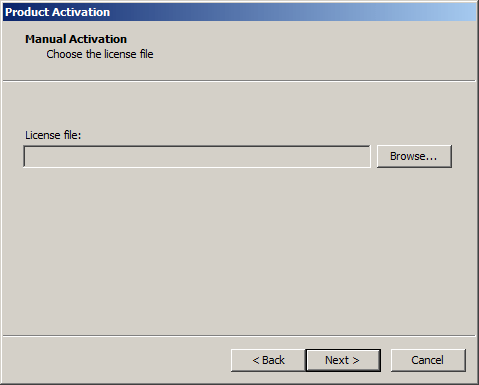
11. Browse to the license file that was downloaded above and click . LiveWire Virtual is now activated and you can begin using the product. The activation process is complete.